


Table of Contents
- Introduction
- Benefits of Using Stencils for Home Decor
- Types of Stencils
- Materials Used in Stenciling
- Tips for Selecting a Suitable Design for Your Space
- Preparing Your Space
- Techniques for Stenciling
- Customizing Stencils by Altering Colors or Patterns
- Maintenance and Touch-Ups
- Conclusion
- Faq's
Introduction
Tired of the same old walls? Looking for a budget-friendly and creative way to refresh your home decor? Stenciled wall art is the perfect solution! This versatile technique allows you to add personality, pattern, and a touch of artistry to any room, without the expense or commitment of wallpaper. Whether you're a seasoned DIY enthusiast or a complete beginner, this guide will walk you through the simple steps to create stunning stenciled wall art that reflects your unique style. From choosing the right stencil and materials to mastering the application techniques, we'll provide you with the knowledge and confidence to transform your space.
Benefits of Using Stencils for Home Decor
- Affordability: Stenciling is significantly cheaper than wallpaper or hiring a professional painter for intricate designs.
- Customization: Endless possibilities for customization with colors, patterns, and stencil placement. Create a truly unique look tailored to your taste.
- DIY Friendly: Relatively easy to learn and execute, making it a great project for beginners and experienced DIYers alike.
- Versatility: Stencils can be used on various surfaces, including walls, furniture, fabrics, and floors.
- Removable: While the paint isn't removable, stencils can be painted over if you decide to change your decor.
- Adds Texture and Dimension: Stenciling can create visual depth and texture to otherwise plain surfaces.
- Quick Transformation: Offers a relatively quick and impactful way to change the look and feel of a room.
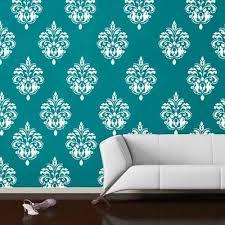
 Benefits of Using Stencils for Home Decor,Pinterest
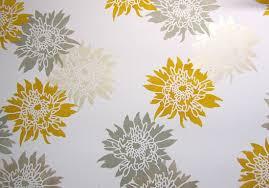
Types of Stencils
- Single-Layer Stencils: The simplest type, featuring a single design cut out of the material. Easy to use and ideal for beginners.
- Multi-Layer Stencils: Consist of multiple stencils that are layered to create more complex and colorful designs.
- All-Over Stencils: Designed to cover an entire wall with a repeating pattern. Often larger in size and require more careful alignment.
- Border Stencils: Intended for creating decorative borders along walls, ceilings, or floors.
- Furniture Stencils: Smaller stencils designed for decorating furniture pieces, such as dressers, tables, and chairs.
- Reusable Stencils: Made from durable materials like mylar or plastic, allowing for repeated use.
- Adhesive Stencils: Feature a sticky backing that helps to hold the stencil in place during application. Ideal for intricate designs or uneven surfaces.
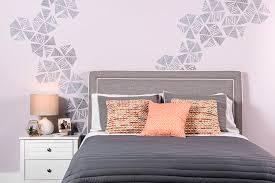
 Types of Stencils,Pinterest
Materials Used in Stenciling
- Stencils: The heart of the project! Choose the right design and material based on your needs.
- Paint: Acrylic, latex, or specialty stencil paints. Consider sheen and color choices.
- Stencil Brush or Sponge: Specifically designed for stenciling, allowing for controlled paint application.
- Painter's Tape: To secure the stencil and protect surrounding areas.
- Measuring Tape/Level: Essential for accurate placement and alignment.
- Paint Tray or Palette: To hold and manage the paint.
- Paper Towels or Cloth: For blotting excess paint and cleaning up spills.
- Drop Cloth: To protect your flooring from paint splatters.
- Spray Adhesive (Optional): For extra adhesion, especially on textured surfaces.
- Craft Knife (Optional): For minor stencil adjustments.
 Materials Used in Stenciling,Pinterest
Tips for Selecting a Suitable Design for Your Space
- Consider Your Existing Decor: Choose a stencil design that complements your furniture, color scheme, and overall style.
- Room Size: Larger patterns work well in spacious rooms, while smaller, more delicate designs are better suited for smaller spaces.
- Ceiling Height: Vertical patterns can make low ceilings appear higher, while horizontal patterns can visually widen a narrow room.
- Style of Your Home: Consider the architectural style of your home. A modern home might benefit from geometric patterns, while a traditional home might suit floral or damask designs.
- Color Palette: Choose colors that complement your existing walls and decor. Consider using contrasting colors for a bolder look, or subtle variations for a more understated effect.
- Test Samples: Before committing to a large-scale project, test the stencil and paint colors on a piece of cardboard or scrap wall.
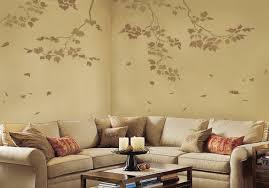 Suitable Design for Your Space,Pinterest
Preparing Your Space
- Clean the Wall: Thoroughly clean the wall surface with a damp cloth to remove dust, dirt, and grime.
- Repair Imperfections: Fill any holes or cracks with spackle and sand smooth.
- Prime the Wall: If necessary, apply a coat of primer to ensure proper paint adhesion and a consistent base.
- Base Coat: Paint the wall with your desired base color and allow it to dry completely.
- Gather Your Supplies: Have all your stenciling materials readily available.
- Protect the Area: Cover the floor with a drop cloth and tape off any trim or surrounding areas with painter's tape.
- Plan Your Layout: Before you start stenciling, plan the placement of your design and mark key points with a pencil.
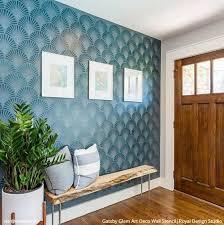 Preparing Your Space,Pinterest
Techniques for Stenciling
- Secure the Stencil: Position the stencil on the wall and secure it with painter's tape. For better adhesion, especially on textured surfaces, consider using a light mist of spray adhesive on the back of the stencil.
- Load Your Brush or Sponge: Dip your stencil brush or sponge into the paint, then blot off the excess paint onto a paper towel. This is crucial to prevent paint from bleeding under the stencil.
- Apply the Paint: Using a light, up-and-down or swirling motion, apply the paint through the stencil openings. Avoid applying too much pressure, as this can also cause bleeding. Work in thin, even layers.
- Remove the Stencil: Carefully peel off the stencil while the paint is still slightly wet.
- Repeat: Reposition the stencil and repeat the process until you've completed your desired pattern. Ensure proper alignment of the stencil to create a seamless design.
- Touch-Ups: Once the paint is dry, use a small brush to touch up any areas where the paint may have bled or smudged.
Customizing Stencils by Altering Colors or Patterns
- Ombre Effect: Use a gradient of colors within the same stencil for a stunning ombre effect.
- Metallic Accents: Add touches of metallic paint for a glamorous and eye-catching design.
- Layering Colors: Use multiple colors within the same stencil, applying each color in a separate layer.
- Distressed Look: Create a vintage or distressed look by lightly sanding the stenciled design after it has dried.
- Color Washing: Apply a thin glaze over the stenciled design to soften the colors and create a textured effect.
- Combining Stencils: Combine different stencils to create unique and personalized patterns.
- Masking: Use painter's tape to mask off certain areas of the stencil, allowing you to create variations in the design.
 Stencils by Altering Colors or Patterns,Pinterest
Maintenance and Touch-Ups
- Clean Your Stencils: After each use, clean your stencils with warm water and soap to remove any paint residue. This will help to prolong the life of your stencils.
- Store Stencils Properly: Store your stencils flat in a dry place to prevent them from warping or bending.
- Touch-Ups: Over time, the stenciled design may become faded or chipped. Use a small brush to touch up any areas as needed.
- Re-Stenciling: If you want to completely refresh the design, you can easily paint over the existing stenciled pattern and apply a new design.
Conclusion
Stenciled wall art offers a fantastic way to personalize your home and add a touch of creativity to your living space. With the right tools, techniques, and a little imagination, you can easily transform your walls into stunning works of art. So, gather your supplies, choose your favorite stencils, and get ready to unleash your inner artist!
explore further
Latest from Contemporary ideas
More from Innovations
Resources


Dwello, for every home buyer, is a way to go from 'I feel' to 'I know', at no extra cost.